- Logon to vmware (root/password)
- Upload images to server datastore:
– Right click “datastore1”, browse to the OVA-ISO folder. Upload files here. - File ➤ Deploy OVF Template, eg: \OVA-ISO\cucm_10.5_vmv8_v1.8.ova
- Right click virtual machine, EDIT virtual machine settings, and insert a Boot CD!
– the ISO image is the same for UNITY and CALL MANAGER, eg:
\OVA-ISO\Bootable_UCSInstall_UCOS_10.5.2.11900-3.sgn.iso
Make sure to check “Connect at power on” - Power machine on (press play), and select the “console” tab to watch progress.
- After a successful boot, follow the installer prompts…
– You will be asked some site specific stuff, be prepared, and record passwords! - Wait for the installer to finish. Don’t forget to uncheck CD “Connect at power on” check box.
- Wait for login prompt in console. You should now be able to ping/logon to CUCM in a browser.
- Select “Cisco Unified Serviceability” from the top right Navigation drop down
- Goto: Tools ➤ Service Activation
- Check all appropriate services for site, eg: Cisco CallManager, and Cisco TFTP, and Save.
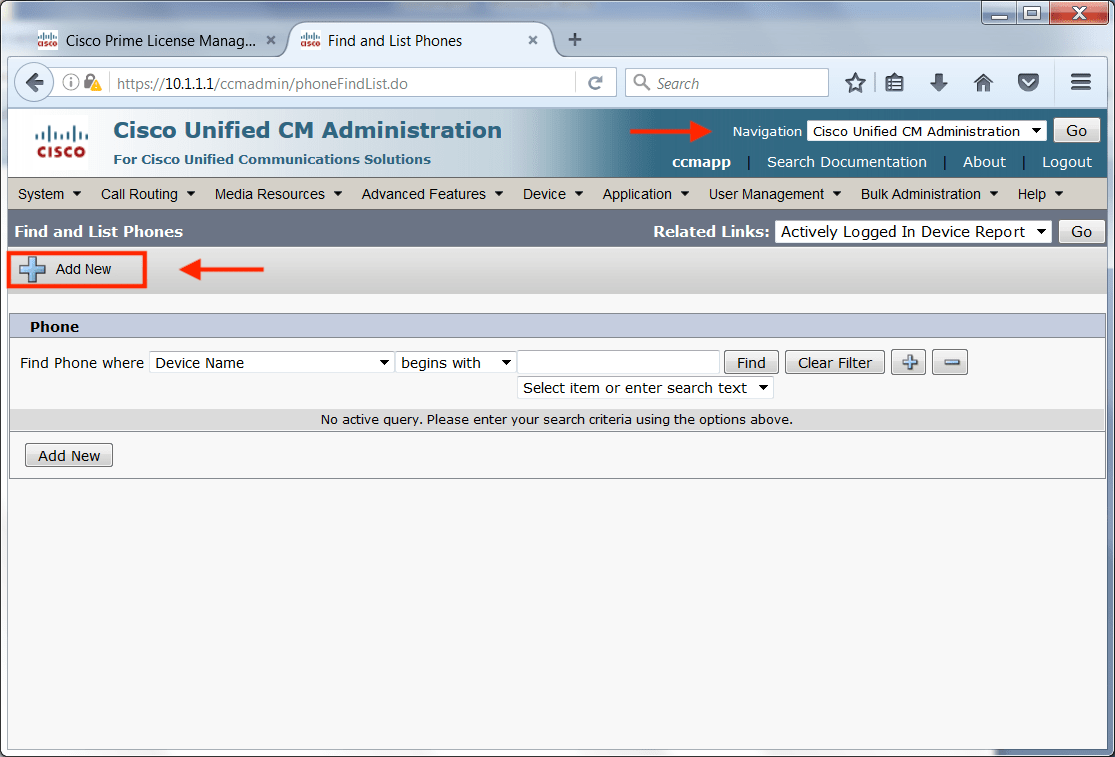
- After setup is complete, you should be able to add a phone in CM Administration (last slide).
Screen shots:
 ❮❯
❮❯